
Conclusiones clave:
- Seleccione el estilo de bisagra adecuado para la forma y la función: elegir el estilo de bisagra adecuado es crucial para la alineación del diseño, el uso diario y el logro de revelaciones precisas en los gabinetes.
- Comprenda la construcción de su gabinete antes de la instalación: la base de su gabinete, con marco frontal o sin marco, determina el tipo de bisagra, la ubicación y las técnicas de instalación correctas.
- Ajuste la alineación para obtener resultados suaves y profesionales: solucione problemas de alineación con ajustes y un manejo cuidadoso para garantizar el funcionamiento y la estética perfectos de la puerta.
En Inspire Hardware, diseñamos con intención y precisión. Cada acabado, borde y peso está calibrado para garantizar el rendimiento y la durabilidad. Nuestras piezas son refinadas, fruto de las manos de artesanos que creen que hasta el más mínimo detalle merece el máximo cuidado.
Instalar bisagras para gabinetes no es difícil, pero hacerlo bien marca la diferencia. Desde elegir el estilo de bisagra adecuado hasta lograr una alineación exacta, este proceso define la apariencia y el tacto de sus gabinetes. Ya sea que se trate de una nueva construcción o de renovar puertas antiguas, una técnica adecuada garantiza durabilidad, un funcionamiento impecable y un acabado impecable. Pequeños ajustes son fundamentales, y un resultado profesional está al alcance de la mano.
Este blog explorará las herramientas esenciales, los tipos de bisagras y las técnicas de instalación que garantizan que las puertas de sus gabinetes se abran sin problemas, se alineen limpiamente y duren años, sin conjeturas ni frustraciones.
Pasos esenciales para instalar las bisagras del gabinete usted mismo
Instalar bisagras de gabinete no requiere cuidado, precisión ni técnicas básicas. Con un poco de planificación, puede lograr un ajuste limpio y preciso que favorezca el funcionamiento suave de la puerta. Revisando un... guía de estilos de gabinetes Puede ayudar a confirmar la ubicación de las bisagras y la estrategia de superposición para obtener el mejor resultado posible si está trabajando con diferentes perfiles de puertas.
1. Reúna herramientas de precisión
- Cinta métrica, escuadra combinada, lápiz
- Taladro/destornillador con brocas de punta afilada
- Broca avellanadora, broca para taladrar bisagras (35 mm para la mayoría de las bisagras ocultas europeas)
- Punzón, abrazaderas, cinta de enmascarar, paño suave
- Tornillos que coinciden con las especificaciones de la bisagra y el material del gabinete.
- Pirámides o bloques de pintor para sujetar puertas
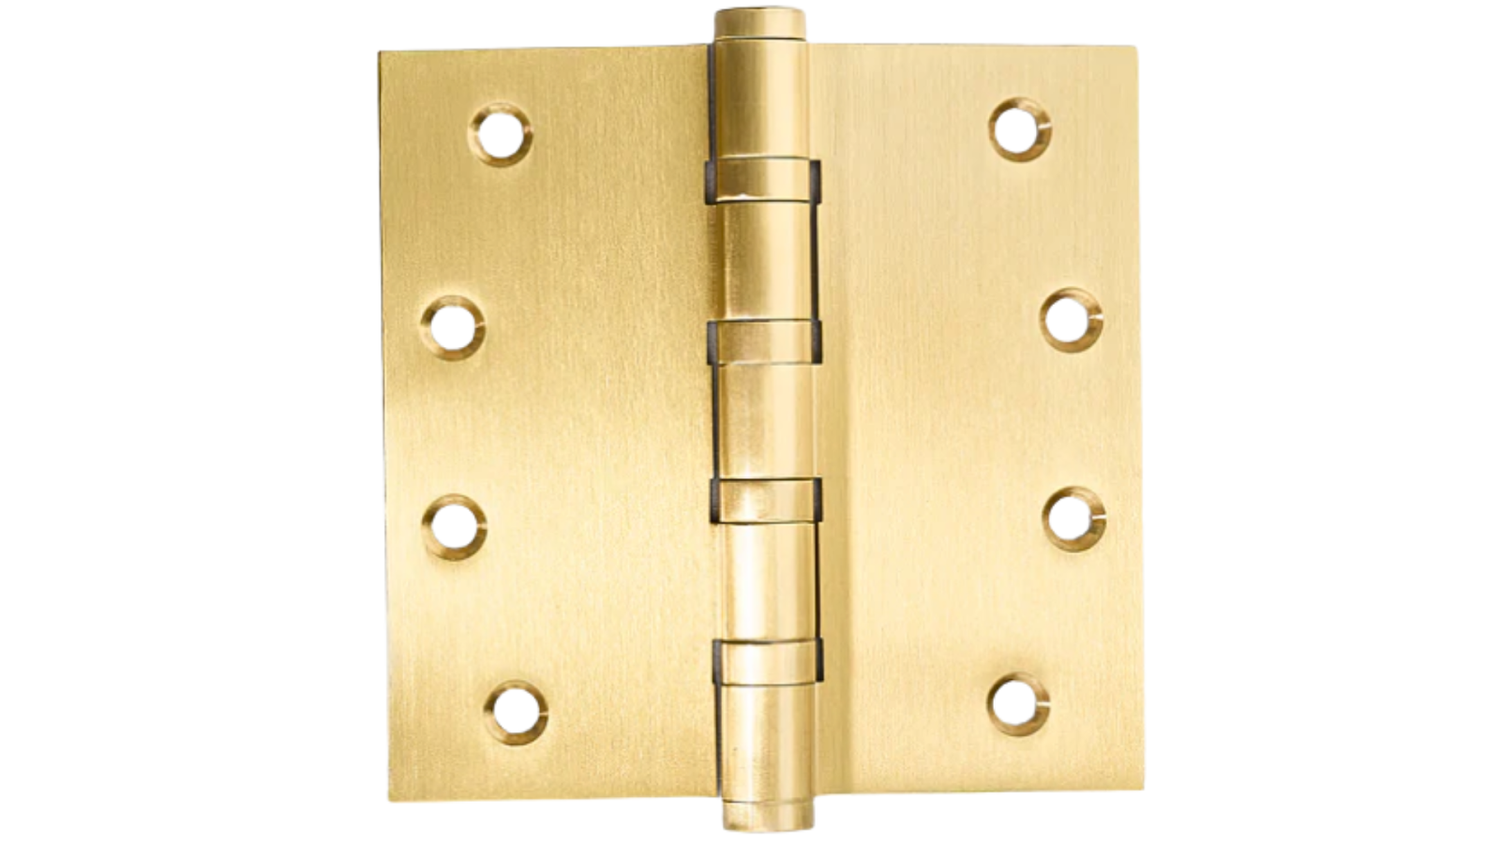
2. Confirme el tipo de bisagra y la superposición
- Identificar la construcción sin marco frente a la construcción con marco frontal
- Determinar la superposición (completa, media o insertada) y el espesor de la puerta
- Verifique la distancia de la copa, la profundidad del orificio y el espaciado de los tornillos del fabricante.
3. Traza tus líneas de referencia
- En el interior de la puerta, dibuje una línea central para cada bisagra (normalmente de 3 a 4 pulgadas desde los bordes superior e inferior).
- En el gabinete, marque las líneas correspondientes en el panel lateral o el marco frontal.
- Utilice una escuadra combinada para mantener las líneas perfectamente cuadradas hasta el borde.
4. Perfore las copas de las bisagras
- Coloque un tope de profundidad para evitar perforar la cara de la puerta.
- Coloque cinta de pintor como guía visual de profundidad y para reducir el desgarro.
- Perfore el orificio de copa de 35 mm a lo largo de su línea central, manteniendo el retroceso especificado por la bisagra (generalmente de 3 a 5 mm desde el borde de la puerta).
- Pruebe el ajuste de la copa de la bisagra; debe quedar al ras sin forzarla.
5. Perfore previamente los orificios piloto
- Utilice un punzón para hacer hoyuelos en las ubicaciones de los tornillos en las áreas de la copa y la placa de montaje.
- Perfore orificios piloto del tamaño de sus tornillos y sustrato (más pequeños para MDF para mantener el agarre)
- Avellane ligeramente si utiliza tornillos de cabeza plana para evitar que se deformen.
6. Instale las copas de las bisagras en la puerta
- Coloque las copas de las bisagras en los orificios
- Apriete los tornillos con la mano para ajustarlos por completo y evitar un torque excesivo y dañar la rosca.
- Asegúrese de que ambas bisagras estén perfectamente alineadas a lo largo de la línea central
7. Monte las placas en el gabinete
- Para modelos sin marco: coloque las placas en el panel lateral según las especificaciones de superposición; use sus líneas de referencia
- Para el marco frontal: utilice el adaptador o placa adecuada diseñada para marcos
- Nivele cada placa, sujétela con abrazaderas si es necesario, luego taladre previamente y fíjela.
8. Cuelga la puerta
- Apoye la puerta sobre bloques para mantener ranuras uniformes en la parte inferior.
- Coloque las bisagras en las placas; escuche y sienta si quedan bien encajadas.
- Compruebe que la puerta se abre libremente sin raspaduras.
9. Verificar simetría y función
- Cierre la puerta lentamente; observe el espacio entre la parte superior, los lados y la parte inferior.
- Asegúrese de que haya una superposición uniforme en toda la longitud de los gabinetes.
- Confirme la acción de cierre suave (si corresponde) y ajuste la configuración del regulador
10. Bloquee el hardware
- Una vez satisfecho con las revelaciones, vuelva a apretar todos los tornillos.
- Agregue un toque de cera de abejas o lubricante seco a los tornillos si anticipa movimiento estacional de la madera.

Solucione problemas comunes de alineación en minutos
Cuando las puertas no encajan bien, se nota al abrir un armario. La precisión importa, sobre todo cuando se trabaja con piezas de alta calidad. herrajes para gabinetes de cocina Diseñado para funcionar maravillosamente y durar años.
A continuación, se explica cómo diagnosticar y solucionar los problemas de alineación de bisagras más comunes de forma rápida, precisa y sin conjeturas:
La puerta roza el marco en un lado
Si la puerta roza contra el marco del armario, lo más probable es que la cazoleta o placa de la bisagra esté demasiado profunda, o que la puerta se haya movido ligeramente durante la instalación. Afloje los tornillos de la placa de la bisagra y ajuste la puerta lateralmente con el tornillo de ajuste lateral, generalmente el tornillo frontal en las bisagras de estilo europeo. Realice pequeños microajustes y pruebe después de cada desplazamiento. Un espaciador de 2 mm entre la puerta y el marco puede ayudar a asegurar una abertura uniforme.
Las puertas no están niveladas en la parte superior
Las puertas desniveladas suelen deberse a agujeros de tornillos desalineados o a gabinetes de base que no están perfectamente nivelados. Comience ajustando el tornillo vertical para subir o bajar la puerta. Si llega al límite de ajuste, afloje ligeramente la placa de la bisagra y muévala hacia arriba o hacia abajo manualmente. Use un nivel torpedo para comprobar la alineación en el riel superior. Si el gabinete está desnivelado, alinee la puerta con las líneas del gabinete, no con el piso.
Espacio en la parte superior o inferior
Las holguras irregulares suelen indicar que la puerta está inclinada hacia adentro o hacia afuera. Comience con el tornillo de ajuste de profundidad para empujar o introducir la puerta. Comience con la bisagra superior y luego ajuste la inferior para un acabado al ras. Si las holguras persisten, afloje ligeramente ambas placas de las bisagras, gire la puerta a su posición y vuelva a apretarlas. Este ajuste ayuda a escuadrar la puerta con el marco para una apariencia limpia y uniforme.
Puertas dobles que chocan en el centro
Cuando las puertas dobles de los gabinetes chocan en el centro, es probable que los ajustes laterales estén demasiado apretados, lo que provoca que las puertas se desplacen hacia adentro. Afloje ligeramente el tornillo lateral de cada puerta, entre 0,5 y 1 mm, y utilice un espaciador de 2 a 3 mm para mantener una separación uniforme durante el apriete. Además, revise los amortiguadores de cierre suave; si están demasiado tensados, pueden provocar rebotes y colisiones.
Los resortes de la puerta se abren o no permanecen cerrados
Si la puerta de un armario no se cierra o se abre con un chasquido, revise si el recubrimiento de las bisagras es incorrecto o si los cierres magnéticos están desalineados. Ajuste el tornillo de profundidad para que la puerta quede a ras. Asegúrese de que los cierres magnéticos estén completamente alineados con sus placas de cierre. Confirme que el recubrimiento de las bisagras sea compatible con el tipo de armario, ya que un recubrimiento desajustado puede forzar la apertura de la puerta en reposo.
Proteja su acabado durante la instalación y después
Al trabajar con puertas y marcos con acabados impecables, trátelos como elementos de diseño. Conserve esa superficie impecable desde el primer orificio piloto hasta la alineación final.
Escenario sobre una superficie protegida
Coloque siempre las puertas de los armarios boca abajo sobre una superficie acolchada y limpia, como una manta de mudanza o papel de estraza grueso. Evite usar toallas, ya que las fibras sueltas pueden atrapar residuos y rayar la superficie al aplicar presión durante la instalación de las bisagras.
Aplicar cinta con precisión
Use cinta de pintor de baja adherencia para proteger las zonas donde puedan entrar en contacto herramientas o manos, como las mortajas de las bisagras y los bordes de las puertas. Pula ligeramente la cinta con una tarjeta de plástico para sellarla y retírela en 24 horas para evitar residuos o la formación de "imágenes fantasma" en el acabado.
Pretaladre con cuidado
Use una broca afilada de punta fina del tamaño del núcleo del tornillo para evitar que se parta y dañe el acabado. Aplique un tope de profundidad o envuelva la broca con cinta de pintor para evitar taladrar demasiado. Retire las virutas de madera a medida que avanza; los residuos debajo de las bisagras pueden actuar como papel de lija con el tiempo.
Evite el contacto entre el acero y las superficies acabadas
Magnetice ligeramente las brocas para fijar los tornillos y evitar que se resbalen. Si usa un destornillador eléctrico, ajuste un par de torsión bajo para evitar el exceso de apriete o el resbalamiento. Termine siempre la instalación de los tornillos a mano para mantener un control total y proteger el acabado de los herrajes.
Utilice los tornillos adecuados para cada paso
Comience con tornillos piloto endurecidos para crear roscas limpias en madera dura sin riesgo de rotura. Una vez fijado el orificio, cambie a los tornillos de acabado final correspondientes. Esto garantiza resistencia y un acabado visual uniforme.
Limpie el hardware antes de la instalación final
Antes de apretar las placas de las bisagras o fijar las puertas, limpie las superficies metálicas con un paño de microfibra y un limpiador sin amoníaco. Si se dejan en su lugar, el polvo abrasivo fino de la perforación puede depositarse en las hojas de las bisagras y rayar o marcar las superficies.

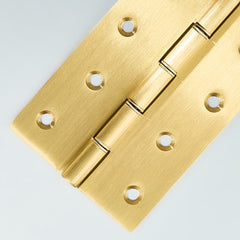
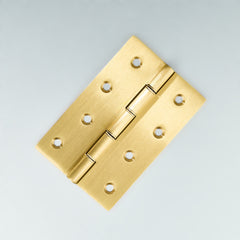
Mantenga y limpie las bisagras de latón para un brillo duradero
Ya instaló las bisagras, las alineó al milímetro y ajustó los marcos. Ahora, proteja esa precisión. Con el latón, el mantenimiento no es un trabajo pesado, sino una gestión responsable. Siga estos pasos para que las bisagras se muevan silenciosamente y luzcan impecables.
- Identifique primero el acabado: Determine si sus bisagras están lacadas o sin lacar. Use un paño de microfibra y agua tibia para ambos. Evite los polvos abrasivos o los limpiadores con amoníaco, ya que pueden dañar el metal o eliminar las capas protectoras.
- Quite el polvo semanalmente para evitar la acumulación: Use un paño de microfibra suave y seco para retirar el polvo de la superficie. Para zonas de difícil acceso, como los bordes de las hojas o las cabezas de los tornillos, es mejor usar un cepillo de precisión pequeño para evitar que la arenilla se acumule en las piezas móviles.
- Limpie las manchas con cuidado: Humedezca un paño de microfibra con agua tibia y una gota de jabón neutro. Limpie suavemente las huellas dactilares y séquelo inmediatamente con un paño limpio para evitar manchas de agua en la superficie.
- Maneje el latón sin lacar con cuidado: Con el tiempo, se observará una pátina natural. Para abrillantar, aplique una pequeña cantidad de pulimento para latón no abrasivo con un paño. Pruebe primero en una zona poco visible y pula en líneas rectas. Mantenga el pulimento alejado de las superficies cercanas.
- Acabados circundantes del escudo: Use cinta de pintor para proteger la pintura o el tinte cercano al pulir o lubricar. Esto evita daños accidentales, opacidad o residuos visibles alrededor del área de los herrajes.
- Control de humedad y sustancias agresivas: La humedad alta acelera el deslustre. Use extractores de aire en cocinas y baños. Evite exponer las bisagras al vinagre, la lejía o limpiadores ácidos, ya que pueden dañar el latón y afectar su acabado.
Consejos profesionales para lograr velocidad y consistencia en proyectos grandes
Gestionar grandes proyectos de instalación de hardware requiere planificación, precisión y sistemas repetibles. Con las técnicas y la mentalidad adecuadas, puede trabajar más rápido sin sacrificar la precisión ni la artesanía, especialmente con materiales de primera calidad como Herrajes para gabinetes de bronce , donde la integridad del acabado y la alineación son clave.
Estandarice las especificaciones de sus bisagras
Elija un tipo de bisagra, revestimiento y patrón de perforación para cada tipo de gabinete. Documente todo: números de modelo, profundidad de cazoleta, altura de placa, tamaño de tornillo y objetivos de marco en una sola hoja de especificaciones. Colóquela en su estación de trabajo y consúltela constantemente.
Construye un juego de plantillas específico
Utilice una plantilla de copa de 35 mm con tope de profundidad positivo y un bloque de guía central para garantizar la repetibilidad. Cree plantillas izquierda/derecha para modelos con y sin marco. Etiquete claramente para evitar mezclar herramientas o medidas.
Trabajo por lotes en secuencias lógicas
Tareas grupales: Marque todas las puertas, el orificio y el piloto e instálelos en orden. Evite cambiar de herramienta entre pasos. Menos transiciones resultan en menos errores y una mejora significativa en la velocidad de instalación.
Utilice palos y medidores de historias fijas
Olvídate de la cinta métrica siempre que sea posible. Usa un calibrador de rueda o una vara de medir para marcar la distancia entre las bisagras. Esto evita errores de medición acumulativos, especialmente en puertas altas o armarios completos.
Tenga listo un kit de emergencia
Tenga extras: bisagras, placas, extractores, masillas de cera, marcadores de retoque. Un tornillo roto o un agujero desgastado no debería retrasar un proyecto. Un kit bien preparado mantiene el ritmo y la profesionalidad intactos durante todo el trabajo.

Reflexiones finales
A usted le importa la precisión, la belleza y la durabilidad, y a nosotros también. Al instalar bisagras para gabinetes con meticulosidad y dedicación, moldea el ritmo diario de un espacio. Mida dos veces, marque con precisión, taladre previamente con precisión y pruebe el ajuste antes de decidirse. Alinee, ajuste y vuelva a verificar. Estos pequeños hábitos se combinan para obtener resultados profesionales que perduran.
Si está especificando herrajes para un cliente o refinando su hogar, confíe en nuestra experiencia. En En Inspire Hardware , diseñamos bisagras de latón macizo que equilibran peso, resistencia y un movimiento preciso, diseñadas para mantener la alineación y un acabado impecable con el paso del tiempo. ¿Necesita ayuda para elegir entre bisagras superpuestas o empotradas, de cierre suave o tradicionales, o acabados a juego para toda su casa o proyecto de hostelería? Aproveche nuestro programa de soporte de diseño personalizado y nuestro programa de asesoramiento personalizado, muestras y entrega rápida.
Cuando esté listo, lo ayudaremos a especificar las bisagras adecuadas, coordinar los acabados y darle vida a su visión con confianza.
Leer más:
- Ideas de cocinas modernas: 10 diseños de gabinetes para una apariencia renovada
- Una guía paso a paso para pintar gabinetes de cocina como un profesional
- Explicación de los acabados de latón: Diferencias entre latón antiguo, satinado y pulido
Preguntas frecuentes sobre cómo instalar bisagras de gabinetes
¿Cómo elijo el tipo de bisagra adecuado?
Comience por identificar el tipo de gabinete, con o sin marco, y su preferencia de estilo. Desde bisagras tradicionales expuestas hasta bisagras ocultas de cierre suave, adapte la bisagra al grosor de la puerta, el revestimiento y la funcionalidad deseada.
¿Cuál es la diferencia entre bisagras ocultas y expuestas?
Las bisagras ocultas se ocultan para una apariencia limpia y una alineación precisa, a menudo con cierre suave. Las bisagras expuestas son visibles, lo que añade un toque decorativo. Su elección influye tanto en el impacto visual como en la función de la puerta.
¿Qué herramientas necesito para instalar bisagras de gabinete?
Las herramientas básicas incluyen un taladro, un destornillador, una cinta métrica, una broca Forstner, una broca Vix y cinta de pintor. Agregue un nivel y un punzón para mayor precisión, y presione suavemente al trabajar con acabados de latón macizo.
¿Cómo tomo medidas para las bisagras nuevas del gabinete?
Mida primero el revestimiento y el grosor de la puerta. Luego, determine cuántas bisagras necesita según el tamaño y el peso de la puerta. Para bisagras ocultas, la posición de la cazoleta y el retranqueo guían la selección correcta de la bisagra y la placa.
¿Cómo puedo quitar las bisagras viejas de un gabinete?
Para sujetar la puerta, desatornille la bisagra del lateral de la puerta y luego del gabinete. Si la bisagra está sellada con pintura, marque cuidadosamente su contorno. Guarde los tornillos y limpie las superficies con cuidado antes de reinstalar o cambiar los herrajes.
¿A qué distancia del borde debo colocar las bisagras del gabinete?
Coloque las cazoletas de las bisagras ocultas a unos 21-22 mm del borde de la puerta, con un retranqueo de 3-5 mm. Deje un espacio de 3 mm y alinee las hojas de las bisagras expuestas para asegurar un giro suave y un ajuste perfecto de la puerta.